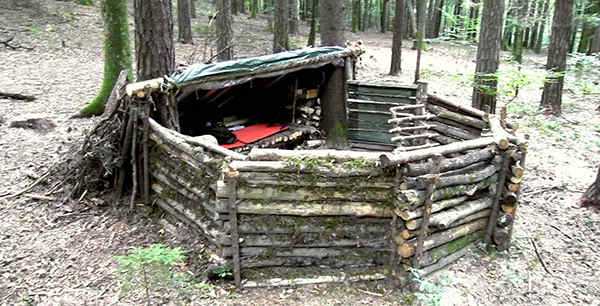
Extreme survival: Building a shelter using materials from nature
07/23/2018 / By Frances Bloomfield

There may come a time where you find yourself without a tent or a tarp for shelter. What will you do then? Simple: Build your own. Using natural materials to create shelter is totally possible and easy if you know what to do. Here’s a simple and basic guide on building a survival shelter with what nature has, courtesy of OffTheGridNews.com.
First thing’s first: Location and time are important
This can’t be stressed enough. Before you go about constructing a stick hut wherever you are, take location and time into consideration.
Hunkering down in low spots, areas with large objects, or areas that are a fair distance from water and food is a disaster waiting to happen. Water and debris are more likely to gather in low spots; large objects like dead, standing trees can fall on top of you and your shelter; and situating your camp far from basic necessities wastes too much time and energy that you can’t afford to waste. Avoiding places with these features is key to staying in one piece.
Time is another vital factor to always keep in mind. Putting together a natural shelter is as time-consuming an endeavor as it is labor-intensive. Give yourself a few hours to build your shelter, maybe four hours at the least. This will ensure that you’ve got a roof over your head before sundown.
Building your shelter
Start with the frame work of your shelter. Look for a ridgepole, which is the horizontal pole along a roof. A good ridgepole is one that’s twice your height and sturdy enough to hold up under rain or snow. Broken trees and thick tree branches make for decent ridgepoles.
After you’ve got your ridgepole, you’ll need a rest for it. Boulders, stumps, and the forks of trees will suffice, so after you’ve got found any of these, prop your ridgepole against the rest. Let one end of the ridgepole lean against the rest and the other end against the ground.
Next, you’ll need to work on the ribbing, which will serve as the support for your roof. Straight and sturdy branches are perfect for this, so gather as many as you can and then place them vertically along the sides of your ridgepole. Be sure to check out how well you fit within your shelter by crawling inside. Ideally, it should be large enough for you to sleep in comfortably but still small enough to retain heat inside. If your shelter is too small, find a larger ridgepole; if it’s too big, then you can either hunt down for a smaller ridgepole or cut what you have down to size.
Once your shelter is just right for you, begin working on your lattice. Brush and twigs are great for this, so add them on the top of the ribbing.
Insulation comes next, since there’s no point in building a shelter if it can’t keep you warm on a chilly night. Dry and fibrous materials like dead pine needles, grass, and broad leaves are your best choices for insulation. If you can’t find these, then hay, straw, yard clippings, and conifer boughs will do. Your insulation should be at least two feet deep. If it looks like you’re going to have a rainy night ahead of you, then add more insulation. (Related: Did you know pine trees can be used as food, medicine and survival equipment?)
While optional, building a roof will give you added protection against the elements. To make a roof, simply add layers of leaves over your ribbing, then a layer of sticks to keep everything in place. Add more leafy layers and, if you like, a layer of insulating material.
To make your shelter even more secure, you can throw a few old bushes and branches outside your shelter to walls to make it appear as though it’s uninhabited. This is one way to keep animal and human intruders from walking on on you while you’ve got your pants down. Digging a ditch a few feet from your shelter is another cautionary measure you should definitely consider. A ditch provides you with cover that you can take advantage of when you need to hide, protect yourself, or pull out your weapon.
Visit Preparedness.news for other guides on getting through a crisis.
Sources include:
Tagged Under: bugging in, bugging out, building a shelter, off grid, preparedness, preparedness and survival, prepping, survival


